 Jungle
Your gank starts before you enter the lane
The side you clear toward determines which ganks you can reach efficiently. Here, I explain how I choose a lane, create an approach, and decide when to commit or leave. For the normal opening routes, start with my Kayn first-clear guide. For the enemy-jungle opening, read my bot-side invade guide.
Before the game, I look at two things: which lane can I realistically gank, and which teammate can turn my help into a win? A lane being nearby is not enough of a reason to spend time there.
Looking for a wall route? Jump to Blue-side bot, Red-side bot, Red-side top, or Blue-side top.
I play toward bot in roughly 80% of my games: two potential kills and often favorable targets for Kayn. The draft and lane state decide whether that default makes sense.
Poppy support with a mobile or disengaging ADC, such as Vayne, is a lane I may choose to avoid prioritizing. In that situation, top and mid can offer a much more practical way into the game.
Choose a lane that can use your help
I compare target vulnerability, our follow-up, and our win condition. Who can carry if I create an advantage? Who has reliable setup? Which enemy can we punish together?
Mid stays flexible because I can visit it while moving between sides of the map. My choice between a top-focused and bot-focused route does not mean ignoring mid.
I also consider my intended form. Repeated ganks on a melee top can delay Blue, so I keep track of that trade-off. A ranged top such as Teemo or Kennen can fit the plan more naturally. Good early opportunities still matter more than forcing a lane only for its orb type.
For the full form decision, read Rhaast or Shadow Assassin? Choose your way to win.
Communicate the plan early, the engage late
Before the play, tell your team what you intend to do. If your opening route is designed to produce an early bot gank, your botlane should know that in advance and preserve an appropriate wave when possible.
As you approach, do not send the final go signal long before you can participate. In my experience, particularly in lower-ranked games, an early ping can make a laner immediately change their behavior: step forward, start trading, or chase before I am in position. That can warn the enemy and close the window.
I want my laner to keep playing naturally until I can join.
| Message | When I want to send it |
|---|---|
| My route and intended lane | Early enough for my teammate to prepare |
| Let the enemy move forward; do not engage yet | While setting up the opportunity |
| I am ready to go | When I can actually join the play |
| Abort or danger | As soon as the situation stops being playable |
Read the wave and the players
Watch what the wave is about to do, not only where it is right now. If the enemy wave is coming toward us, a short wait can let the opponent move farther from safety. Running in immediately may waste a better opening.
Wait only while the opportunity is improving. I cover the cost of waiting in Protect your tempo.
Health, summoner spells, and available abilities matter for both teams. My full health does not make a gank good if my ADC and support are low, have no summoners, and cannot meaningfully follow up.
In that situation, I may help without forcing a kill:
- Push the opponents back so my lane can breathe.
- Take an enemy summoner if the exchange is favorable.
- Help finish a push so my teammate can recall safely, if that is the wave outcome they need.
Coordinate the wave help. Do not automatically hit every wave after arriving, especially if your laner wants to keep it where it is.
Save the tools that make the gank work
For my early ganks, I want E and W ready. I try not to spend E during the clear immediately before the approach if I will need it to enter from behind. I also account for W’s cooldown before committing to a play that needs its slow or control.
I use E to create an angle, rather than simply run straight at the opponent. I want to cut off their retreat: my teammate pressures from the lane, while I approach from the direction the enemy would like to escape toward.
Ask yourself where you would run if you were the target. Then decide how to occupy that space.
Botlane: pressure the carry without ignoring the support
My usual target is the ADC, but I do not treat that as permission to walk through the support’s crowd control.
Against Nautilus or Leona, I expect them to intercept me or protect the route to their carry. I account for that before entering. E can help me choose a different angle; Q or, when the play justifies it, Flash can help me avoid a key ability.
Take the support kill when it is the sensible result. Do not throw away a good play by chasing an unreachable ADC.
Ranked example: punish Lux for stepping forward
Watch the lane before you enter. Caitlyn and Lux start walking up, and Lux steps too far onto our side. That’s my cue to come through the wall with E.
Show solution
Look for Caitlyn's traps and Lux's Q. Either can stop your entry long enough for the other to follow up. In this clip, Lux has already used Q and immediately Flashes away. I can finish the kill and leave lane without wasting time chasing or standing around.
Check where the enemy jungler is, then look at who can move first from bot and mid.
Premium solution · coming laterRead the next play
More examples of what to do during and after a gank. Swipe or scroll to browse.
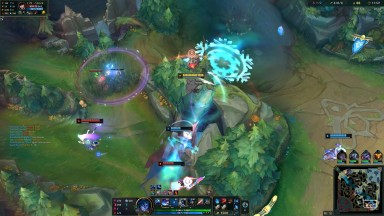 Locked
The gank ends. The ambush starts.
Use Bard’s portal and stun for a deep bot gank, then decide how to extend the play.
Think it through: With Yi top, where could you catch Caitlyn when she comes back?
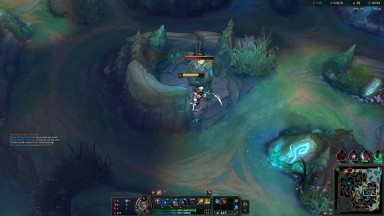 Locked
The half-countergank
Read Graves’s path from Blue, cover Ahri from fog, and wait for him to commit.
Think it through: If Graves comes from top, where can a low Ahri retreat to you?
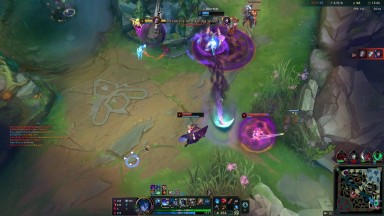 Locked
Keep watching after the gank
Watch the map during your reset and react when Graves shows near a vulnerable teammate.
Think it through: Yone is low and still pushing. What would make you cancel your recall?
Approach from behind the river vision
I use the dragon pit and enemy-jungle walls to approach from the opponents’ escape side. The routes below show how I work around river vision and where I may still be seen. Additional wards or opponents on the route can reveal me.
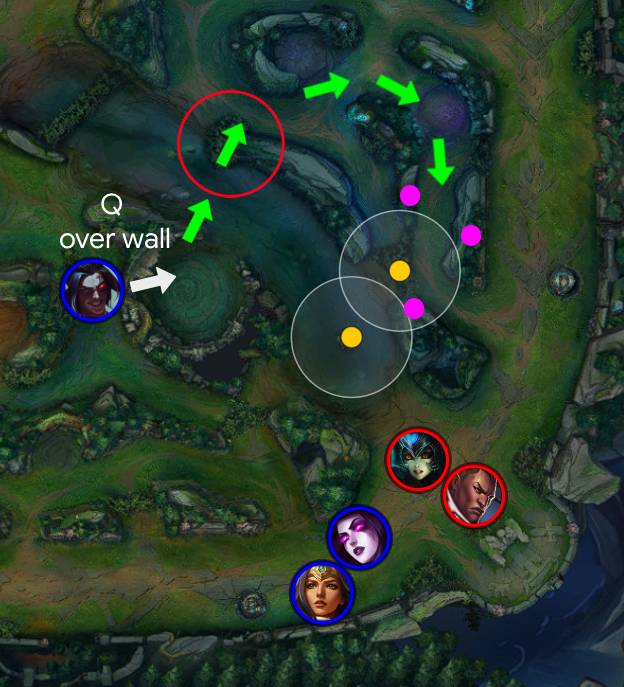
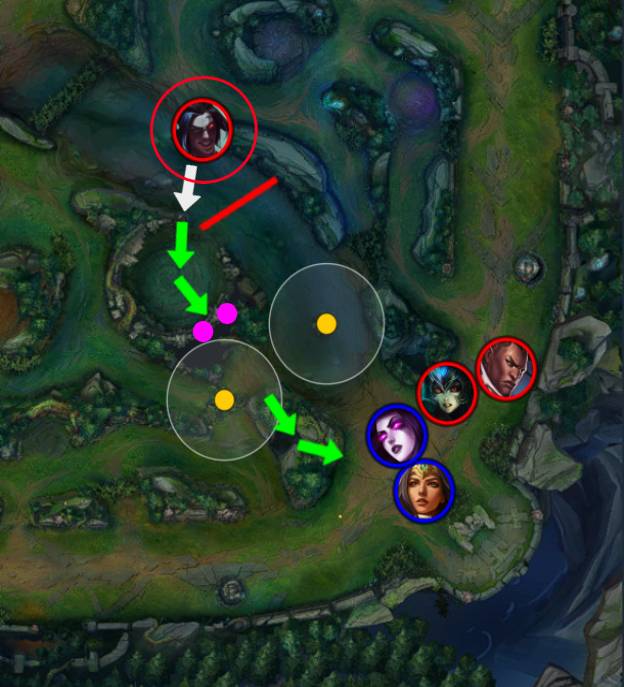
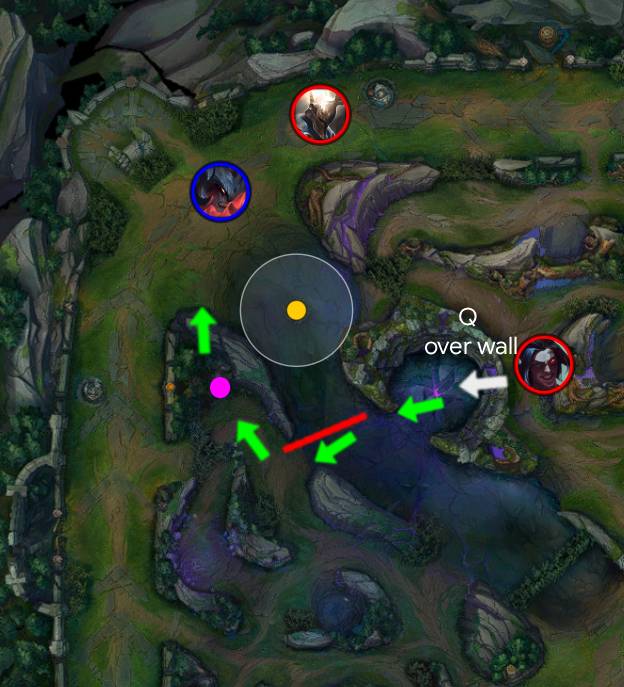
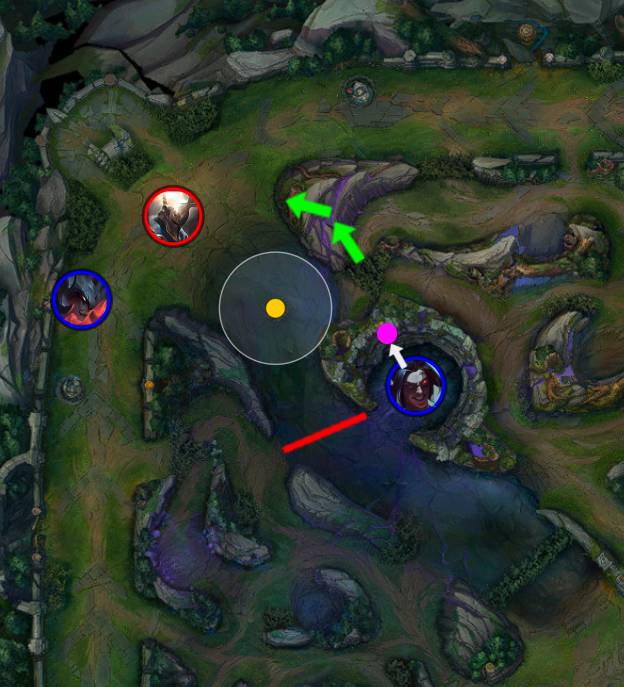
Map key: green arrows show the route; yellow dots and pale circles show wards and their vision ranges; pink dots mark alternative E entries. A red circle marks a brush that must be unwarded. A red line marks approximate Faelight coverage. The in-game screenshots provide the terrain reference for those rough lines.
Read the Faelight coverage before choosing your angle
Use these views to judge Faelight coverage near the dragon pit, particularly for the red-side approach.
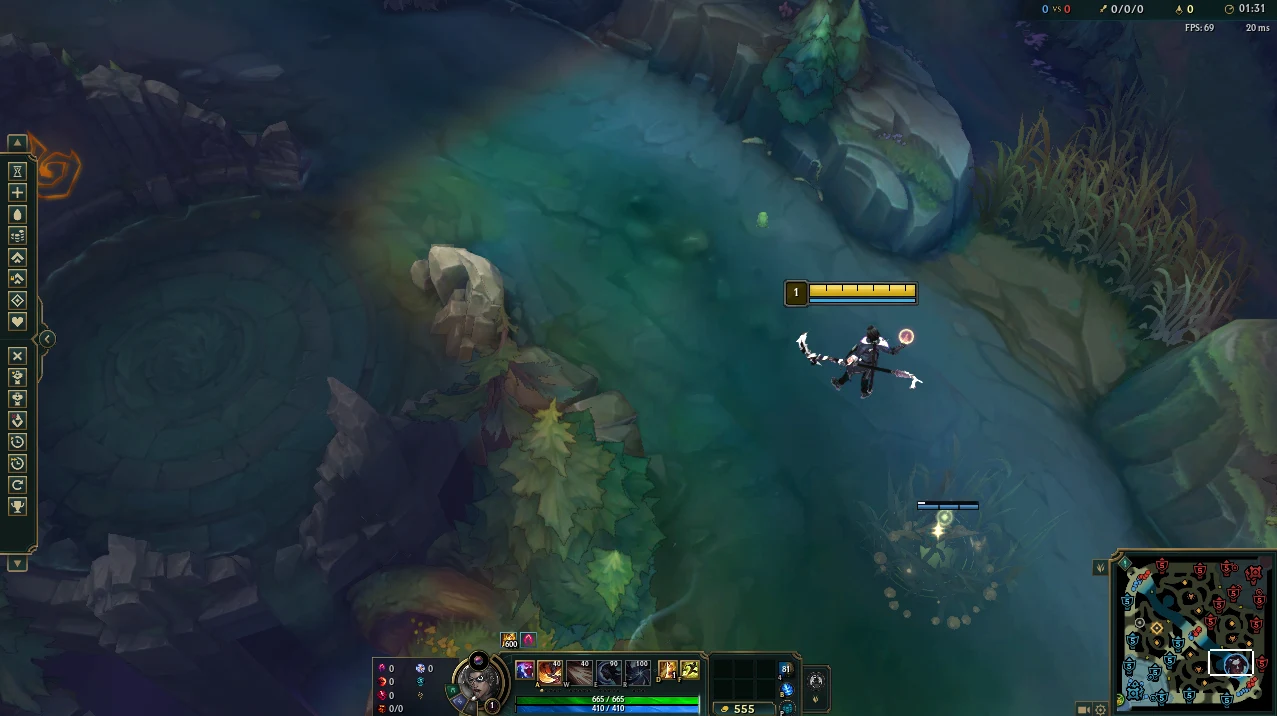 (opens full size in a new tab)
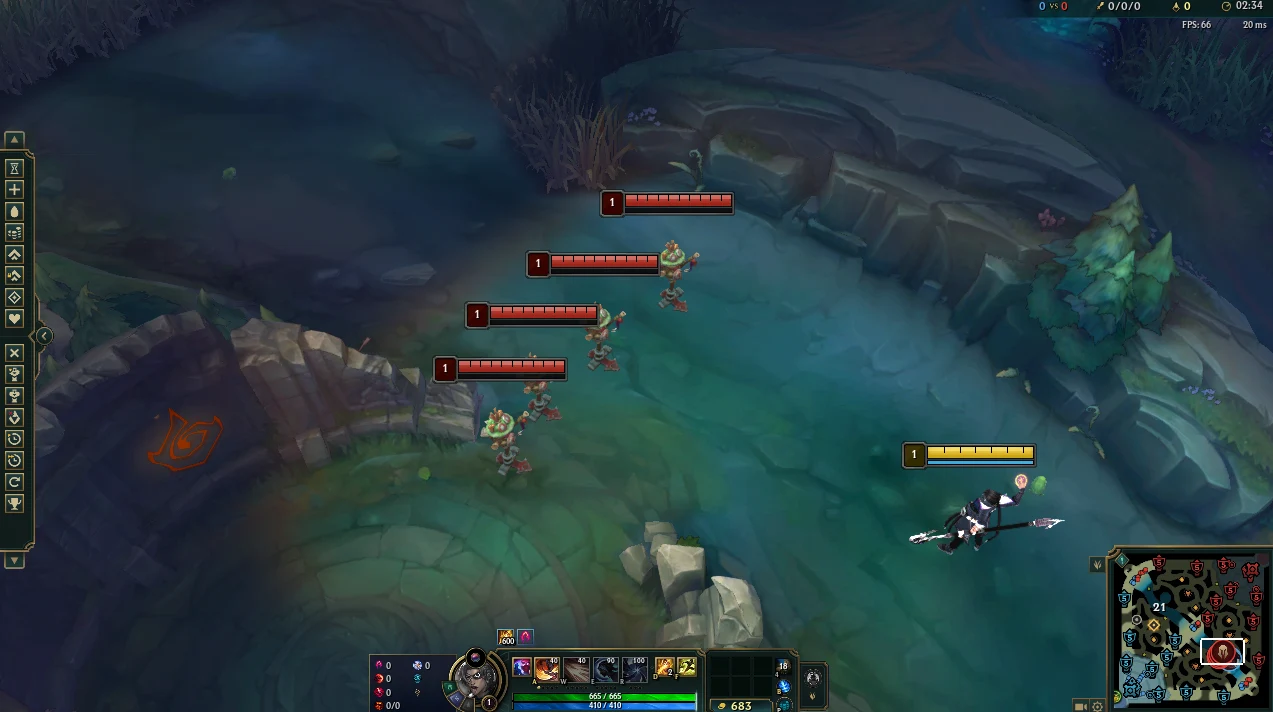 (opens full size in a new tab)
Blue-side route: from the pit to the engage
 (opens full size in a new tab)
Choose one of the three pink E entries based on the opponents’ position.
- Tell botlane I am coming. Announce the plan before taking the route; hold the engage ping.
- Q over the wall into the dragon pit. From there, I walk into the river toward the enemy jungle, keeping E available for the actual lane entry.
- Enter from the far-right edge of the approach. The red-circled brush must be unwarded. I hug that edge to bypass central river vision; the exact ward position determines whether this works.
- Continue past the enemy blue-buff and Gromp area. I follow the green route around the illustrated ward coverage and choose an E entry based on where the opponents are standing.
- Choose one of the pink entry points. In this example, the first two along the route sit outside the two drawn ward ranges. The third is closer to the lane but inside ward range, so I expect to be seen before entering with E. That can still be fine: by then, I may already be close enough to start the fight.
- Ping again at the chosen pink point. Once I can join with E, my botlane steps forward aggressively and we engage together.
Red-side route: through the pit, behind their botlane
 (opens full size in a new tab)
- Announce the gank while planning the route. My botlane knows I am coming, but should not start the engage yet.
- Move into the dragon pit along the drawn approach. With the circled brush unwarded, I use the pit angle to stay outside the illustrated Faelight coverage instead of walking farther down the exposed river.
- Reach one of the pink E entry positions. Against the vision shown here, I can reach this area unseen. I then use E through the wall to approach the opponents from their own side, behind them. The aim is to stay hidden as far into the approach as possible, potentially until close to the second wall along the green route.
- Ping at the entry and commit together. Once I am at the pink area and ready to come through with E, I send the engage ping. That is our signal to go all in: my botlane pressures from the lane as I arrive from behind.
An opening I like: the enemy-side level-three gank
One of my planned opening routes starts with three camps in the enemy’s bot-side jungle, followed by a bot gank from their side of the map.
The opponents may not expect a level-three approach from that direction. I look for a double kill or a major summoner-spell advantage that we can build on.
The setup starts with communication. My botlane needs to know the plan early enough to avoid needlessly pushing away the gank window, when their matchup allows it. I want E and W available for the approach rather than spent just before it.
The invade depends on the jungle matchup, vision, and which lanes can move first.
Toplane: use the length of the lane
Top can be very attractive to gank because the long lane gives me room to get behind an opponent. A favorable target and wave can make this a better investment than forcing a difficult bot matchup.
Teemo before level six is an example I like: his blind does not remove my entire ability combo. I still check health, wave size, and whether my teammate can follow up.
Top river: understand the vision first
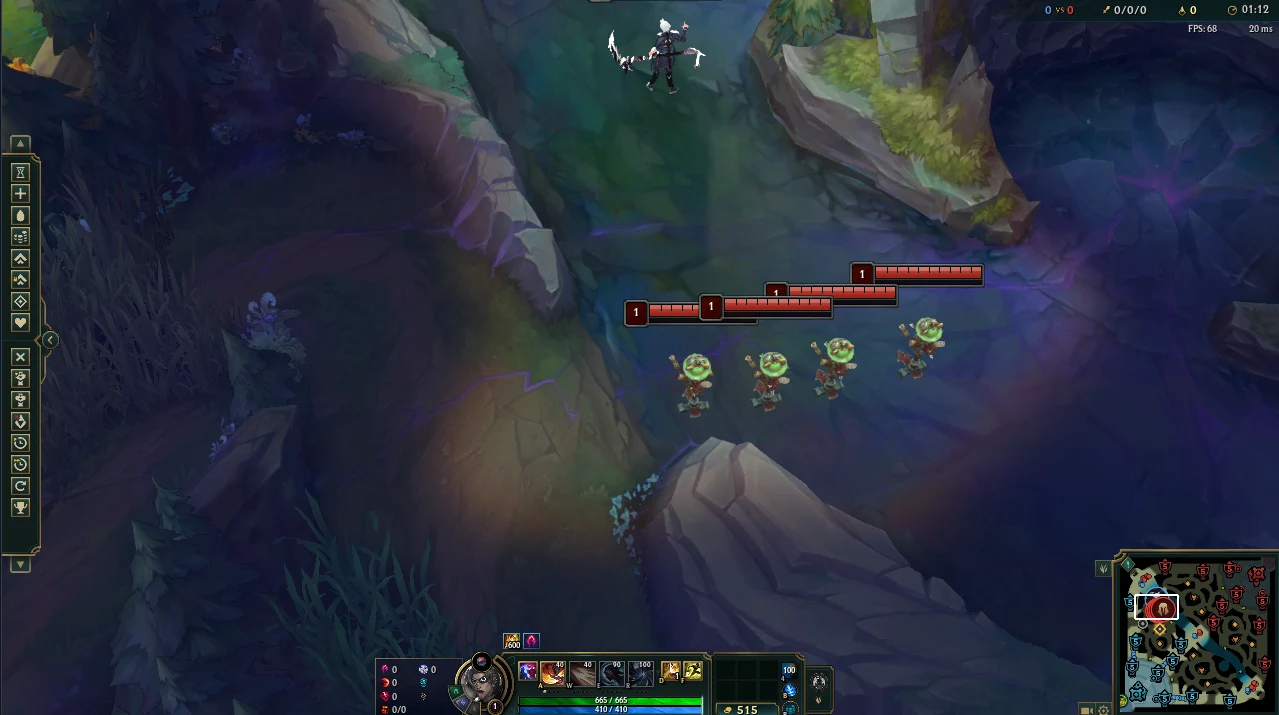
These views show the river-brush ward setup and approximate Faelight coverage near the top objective pit. Compare them with the red lines on the route maps below.
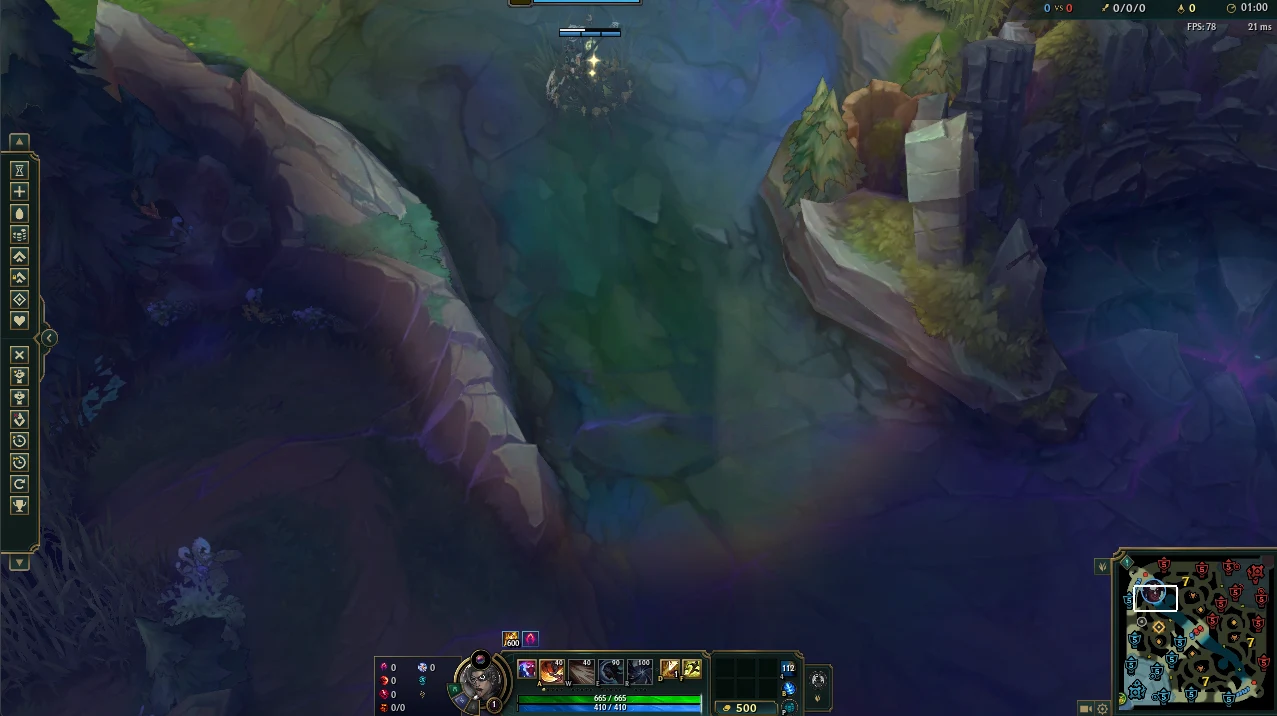 (opens full size in a new tab)
 (opens full size in a new tab)
The maps use the same key as botlane: green route, yellow ward, pale vision circle, red Faelight boundary, and pink E entry. Both approaches avoid the vision shown; check for additional wards along the route.
Red-side top gank: Q into the pit, save E for the lane
 (opens full size in a new tab)
- Q over the wall into the top objective pit. This gets me across the first wall without spending the E I want for the gank.
- Walk out into river toward the enemy top-side jungle. Follow the green route around the illustrated Faelight coverage rather than taking the obvious exposed line toward the lane.
- Reach the pink point near the enemy-jungle wall. In the setup shown, this puts me at the E entry without crossing the ward’s vision.
- E through the wall and come out behind the opponent. I cut off their retreat from the enemy-jungle side while my laner pressures from the lane.
Announce the plan early; ping the engage when the E angle is ready.
Blue-side top gank: E from inside the pit
 (opens full size in a new tab)
- Walk into the top objective pit. From blue side, I use the pit as my staging position rather than repeating the red-side river detour.
- Start E at the pink point inside the pit. Enter the pit-side wall, then continue through the enemy-side wall along the green route.
- Emerge behind the enemy top laner. Against the river vision illustrated here, this angle lets me approach from behind without showing on the way in.
I still need the opponent far enough forward and my teammate ready to participate. Avoiding the river ward gives me the approach; the lane state gives me the gank.
Midlane: play around reliable setup
Mobile midlaners such as Katarina or Ahri can make a gank difficult if my own midlaner cannot hold them in place. Mid is not automatically a good use of time just because it is on the way.
An allied Malzahar with R available changes my priorities. His ultimate, Nether Grasp, gives us a clear setup window. I like planning my visits around that cooldown and being ready when he can use it.
That can make mid a repeated priority. Check that we have the damage and account for enemy answers or backup.
As elsewhere, I look for an E approach from the enemy-jungle side to reduce their escape space. I want my route and my teammate’s setup to work together.
Lane ganks and the bounce-back window
If my team is pushing, I may be able to enter a lane brush without the opponents seeing me. That can set up a lane gank or, if the conditions are right, a dive.
A particularly good situation is a wave that has been pushed in and is about to bounce back. I can prepare while the enemy is near their tower, then use the moment when they need to step forward again.
Here, teammate behavior matters just as much as my hiding place. I want them to avoid revealing the setup by suddenly playing as if help has already arrived.
Being in the brush does not make a dive good. Recheck health, cooldowns, and enemy backup before committing under tower.
Vision tells you to reassess
I often use Sixth Sense, especially on Blue. If it identifies a ward while I am approaching, I treat that as a reason to reconsider whether my route is already known.
Then I watch the opponents. Did they move back? Are they inviting an engage that looks suspicious? Can I still create a real opening?
Detection is information, not an order to keep going or immediately leave. A gank can still work after being seen; it can also become a trap. Consider where the enemy jungler or another opponent could join before committing.
Protect your tempo
Kayn can create kills and clear efficiently. I do not want to give up that second strength by spending too long waiting for a gank that never becomes convincing.
If the play does not develop, leave. I would rather abandon a weak opportunity early than realize too late that the enemy jungler has cleared several camps while I stood in a brush.
Even a successful kill may not repay that cost, particularly if it is a low-value result after a long delay. Think about what you spent, not only the kill notification.
Blue still needs to fulfill its assassin role. Farming is not an excuse to ignore good opportunities, just as chasing kills is not an excuse to abandon your clear for nothing.
Counterganks start with tracking
When planning my opening path, I want an early ward on one side of the enemy jungle, such as their raptors or blue buff. I coordinate this with my midlaner: one of us should cover that information if we can do so safely. Tracking the enemy jungler is a core responsibility in my approach, not an optional extra. That does not mean dying to place a ward.
Seeing their opening gives us a starting point for reading the map. It is not permanent knowledge of their position. I distinguish where I last saw them, where I expect them to be, and what I actually see now. Routes can change, so I update the read rather than treating the first ward as certainty.
I communicate that information with pings. A confirmed sighting and a likely gank should both help my team prepare, but I do not present a prediction as a confirmed position.
If we are clearing toward the same side, I am already thinking about a countergank. Can I be near the lane when they arrive? Would our response win, or should my presence simply discourage them?
Being there does not mean going all in
Counterganking can mean showing up, covering the retreat, or being enough of a threat that the enemy jungler stops the play. I do not need to force a full fight to make my response useful.
Against Wukong before level six, while I am still without a form, I generally expect to lose the botlane 3v3 unless our botlane has a meaningful advantage. I assess the actual health, cooldowns, and numbers before choosing my response.
I may still need to be there to help my lane disengage.
Let them commit, then choose your opening
When I believe we are stronger, I sometimes wait for the enemy jungler to start the gank. My botlane begins backing toward our side, and the opponents follow or group up while trying to reach a target.
That movement can create the angle I want. Once the opponents have committed and spent important abilities or summoners, I enter with E over the wall and look to turn the fight. Their spent resources and deeper position are the opportunity; simply arriving late is not the strategy.
Do not wait until your ADC is nearly dead. I need my teammates healthy enough to survive the entry and participate in the response. If they cannot safely give ground, I show earlier or help them escape.
My decision is:
- Read where the enemy jungler is likely to act and warn the lane.
- Check whether we can win a fight or only need to prevent one.
- If we are stronger, watch for commitment, useful cooldowns being spent, and a good wall angle.
- Enter while my team can still respond; otherwise cover the retreat.
The goal is to stop their gank and turn their commitment into our advantage when we can.
The check before I commit
- Opportunity: what makes this gank playable right now?
- Wave: is the lane becoming better to gank, or moving away from the window?
- Follow-up: can my teammate actually help with their current health and cooldowns?
- Tools: do I have E, W, and any other resources the plan needs?
- Angle: am I cutting off the retreat or just chasing from the front?
- Information: what can see me, and who could respond?
- Time: what is my reason to stay, and when will I leave?
A good gank has a purpose. That purpose may be a kill, a summoner, pressure, a reset, or an objective afterward. Recognize the result you can realistically get, and do not force a different one.